> ## Documentation Index
> Fetch the complete documentation index at: https://uncoded.ch/docs/llms.txt
> Use this file to discover all available pages before exploring further.
# 4.1 Zeabur Server Setup
This guide explains how to install and set up your unCoded Trading Bot on a Zeabur Cloud Server running Ubuntu. The setup process is simple and doesn’t require deep Linux knowledge.
***
**Requirements**
Before you begin, make sure that:
* You have an active **Server.**
* See recomandations in [System Requirements](https://uncoded.ch/docs/un-coded-system-requirements).
* You already have your [**Binance API keys**](/2-binance-account-configuration) and [**Telegram bot credentials**](/set-up-telegram-for-un-coded) (Optional)
### Start with Zeabur
If you want to set up unCoded on Zeabur, start by opening Zeabur here:
[Open Zeabur](https://zeabur.com/templates/FX6Y6O)
Once you are logged in, **continue with the steps in this guide.**
* First, log in to Zeabur using any method you prefer.
* Then, click **"Servers"** in the left-hand menu and select **"Create"**.
* Choose **"Buy a Server from Zeabur"**.
* Next, select **"Buy New Server"** if it is not already selected.
* Then apply the [recommended filter settings](/un-coded-system-requirements).
* After that, choose a server from the list. It is recommended to select a server located in your own country and/or region if available.
* Click **"Purchase Now"**.
* Add a payment method if you have not already done so.
* Click **"Confirm and Pay"** to purchase the server.\
Your server will now be provisioned. This may take a moment.
***
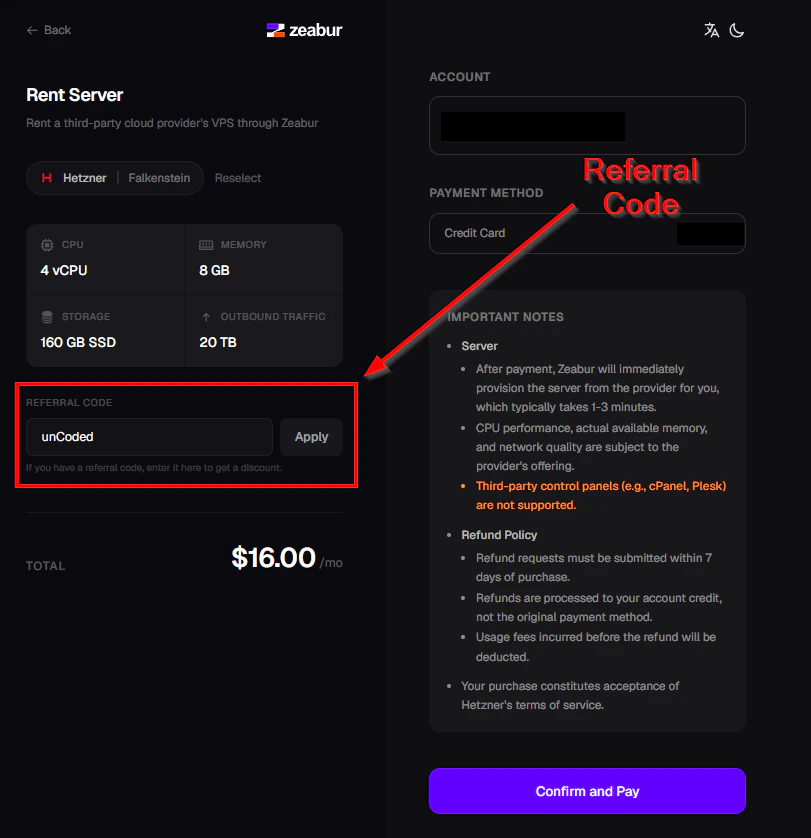
Use the code **“unCoded”** for **10% off** your first server purchase.
***
* Once your server is ready, switch to the **"Projects"** tab and click **"New Project"**.
* Select your server and click **"Create Project"**.
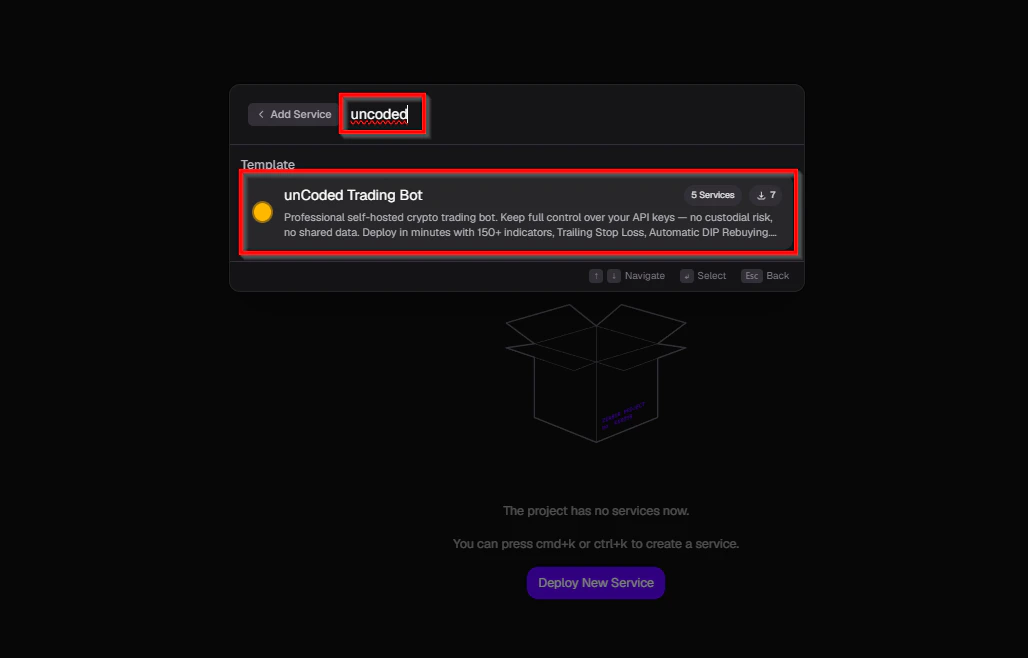
* Click **"Deploy New Service"** and search for **"unCoded"** in the search bar. Then select **unCoded**.
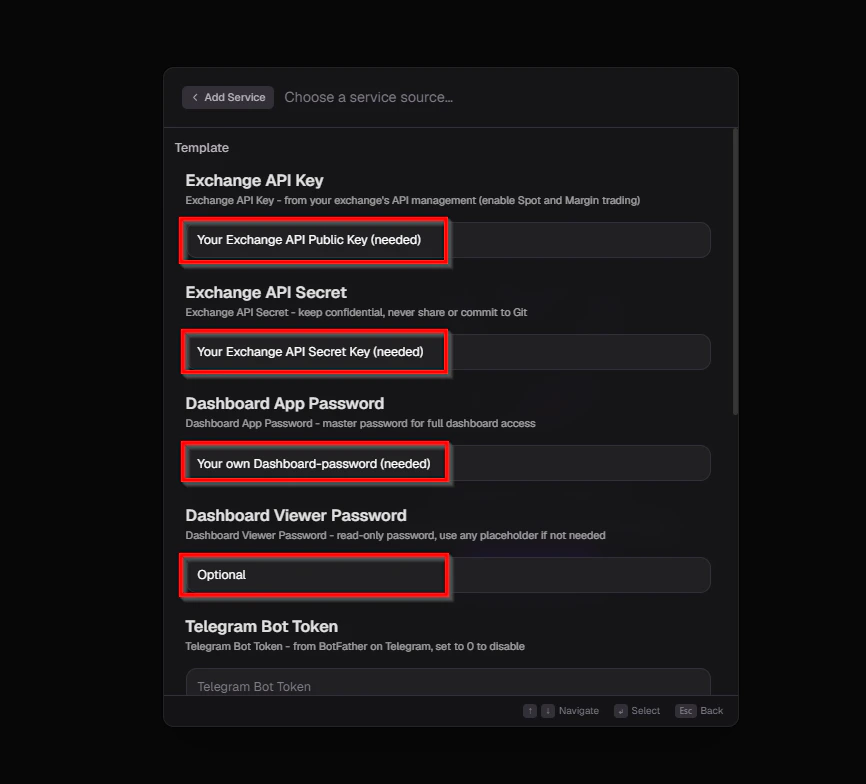
* Fill in the missing fields with the required data. You’ll find most of it on Binance, such as API keys. Passwords and domains can be chosen freely.
* Click **"Deploy"**.
Once the project has been deployed and the domain has been provisioned, you can continue setting up your bot. To start the bot setup itself, simply click on your domain. [You can find out how to set up the bot here](/4-initial-bot-configuration-and-first-start).
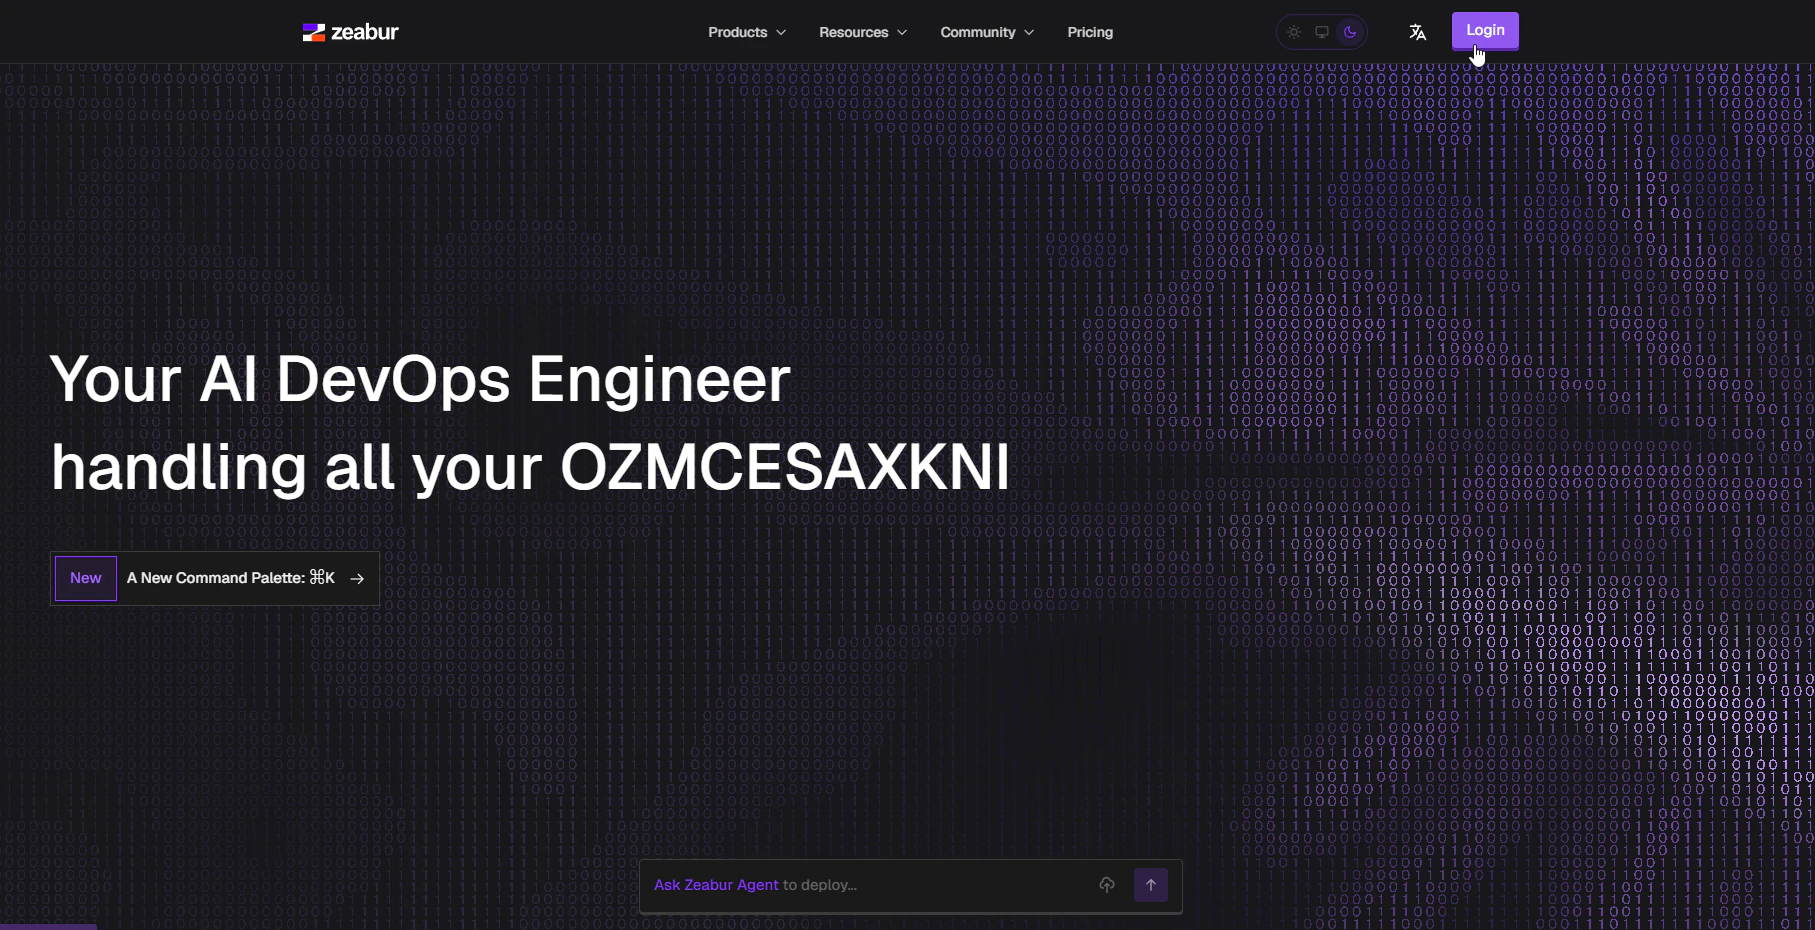 * First, log in to Zeabur using any method you prefer.
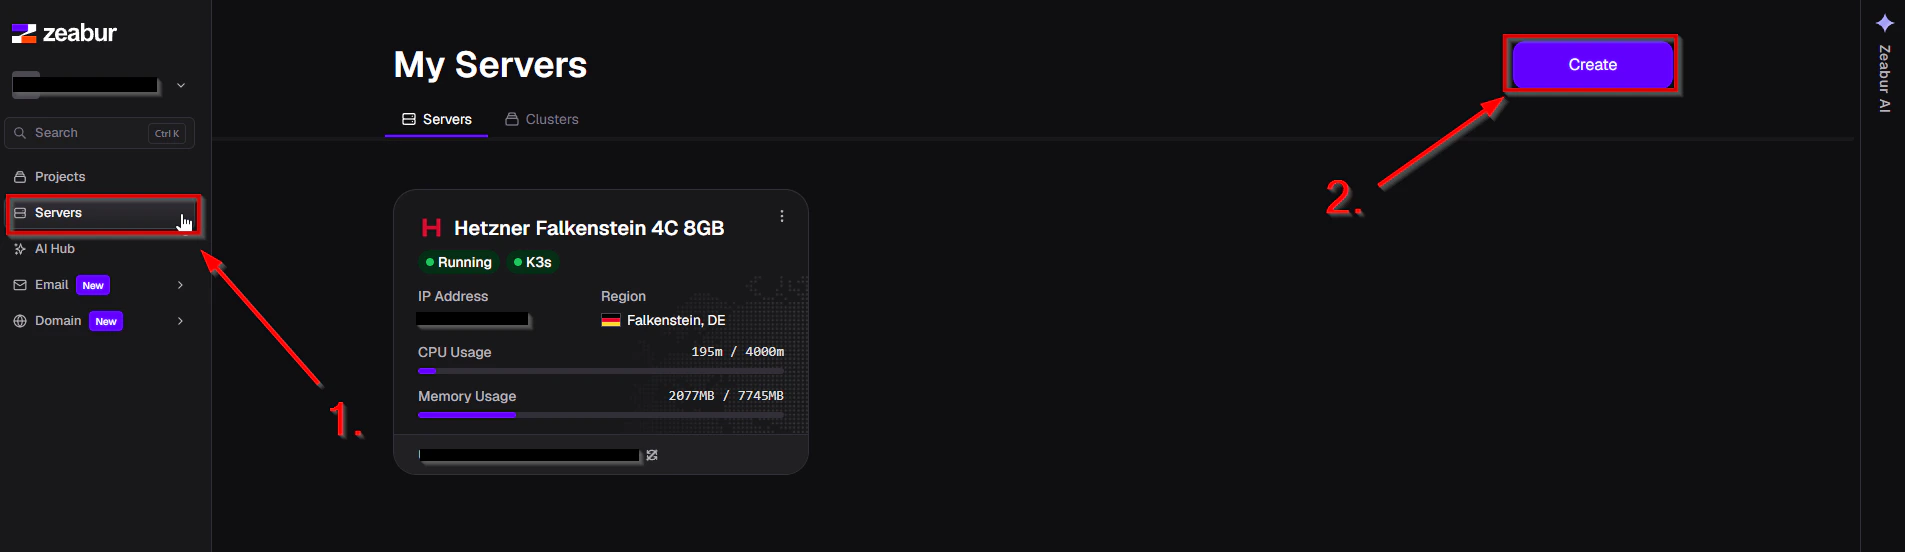 * Then, click **"Servers"** in the left-hand menu and select **"Create"**.
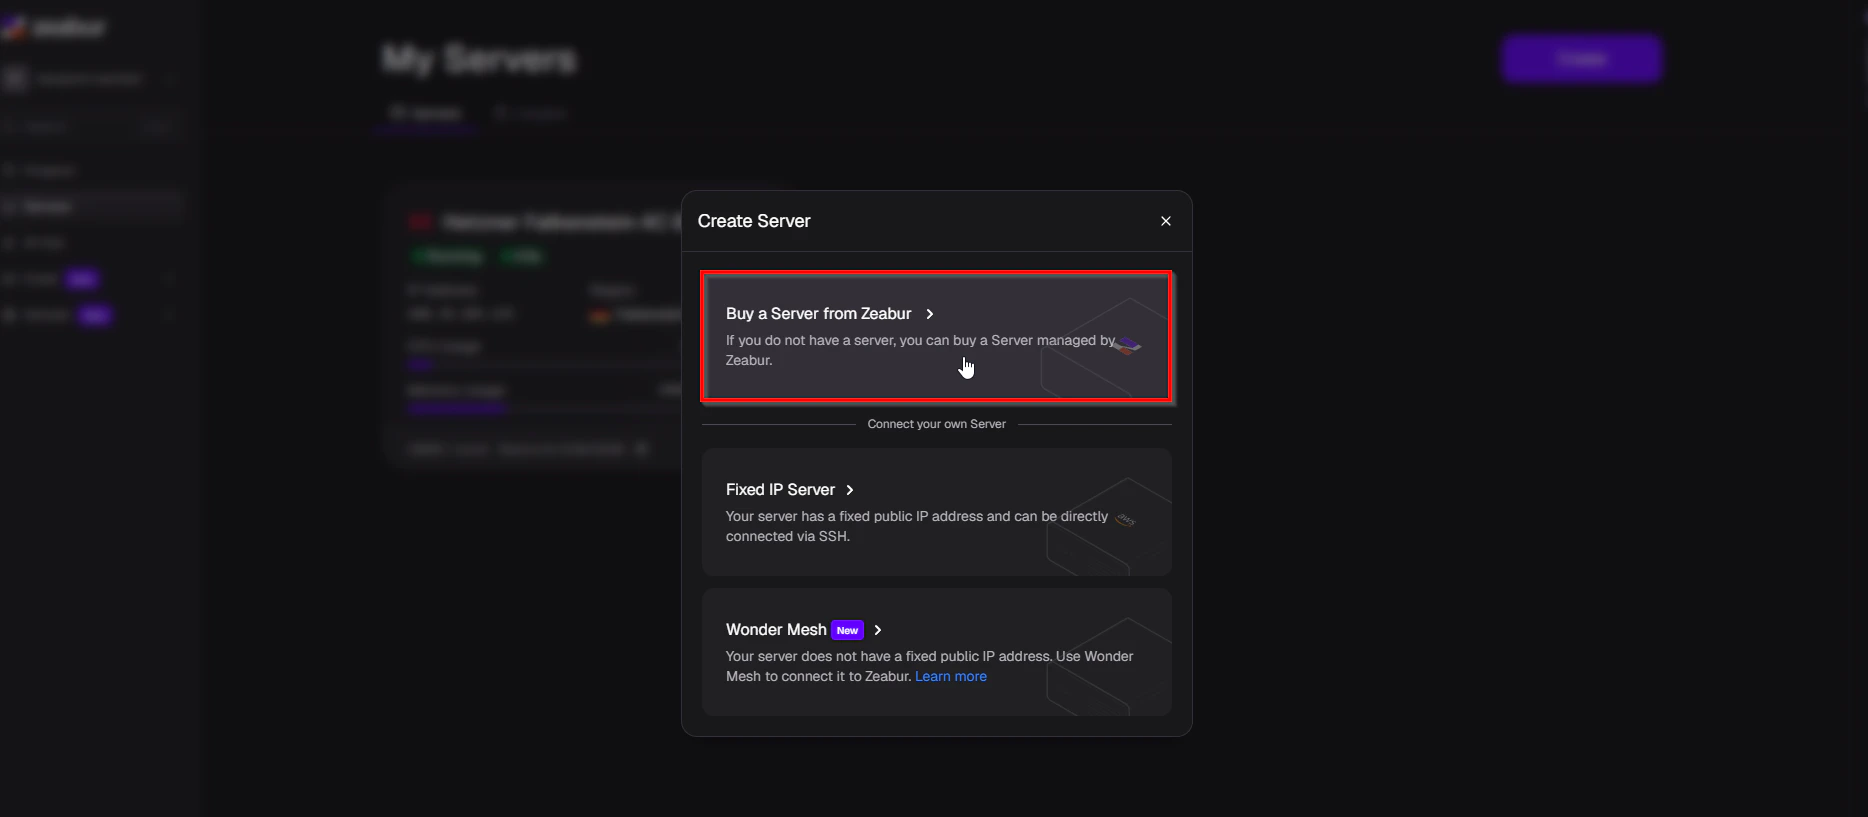 * Choose **"Buy a Server from Zeabur"**.
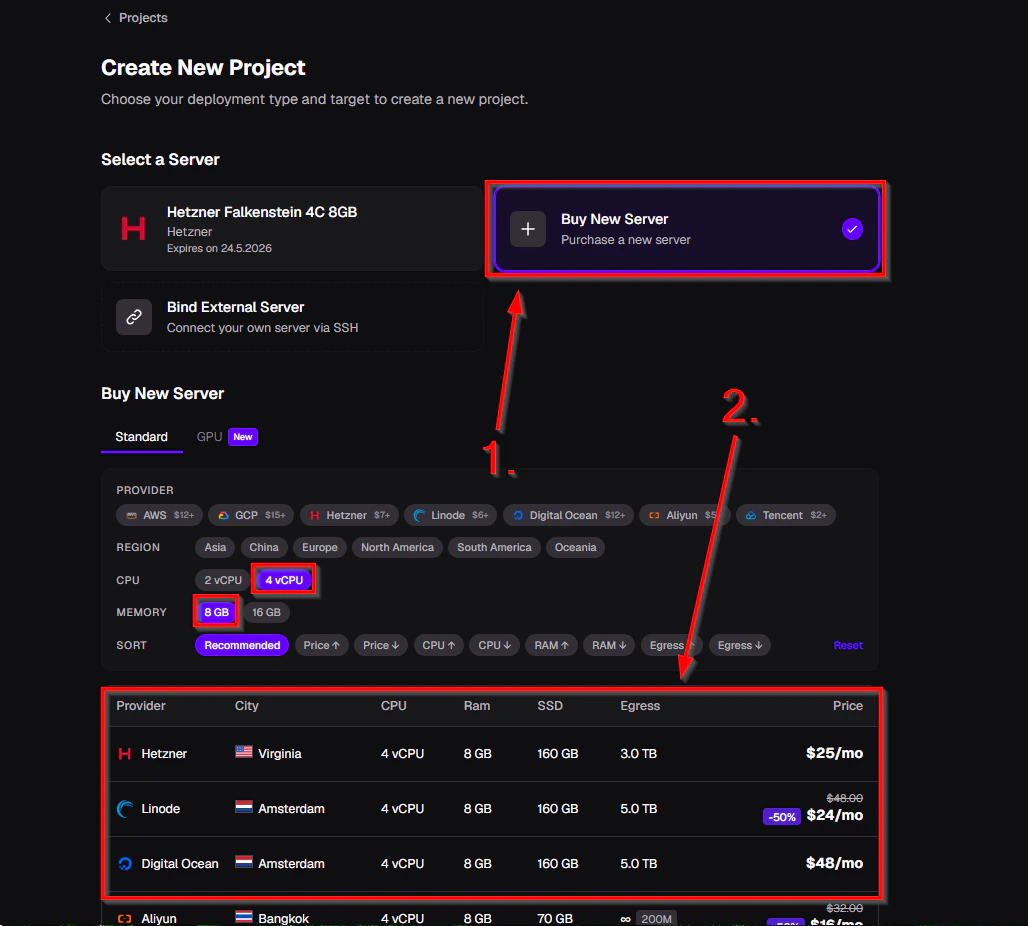 * Next, select **"Buy New Server"** if it is not already selected.
* Then apply the [recommended filter settings](/un-coded-system-requirements).
* After that, choose a server from the list. It is recommended to select a server located in your own country and/or region if available.
* Next, select **"Buy New Server"** if it is not already selected.
* Then apply the [recommended filter settings](/un-coded-system-requirements).
* After that, choose a server from the list. It is recommended to select a server located in your own country and/or region if available.
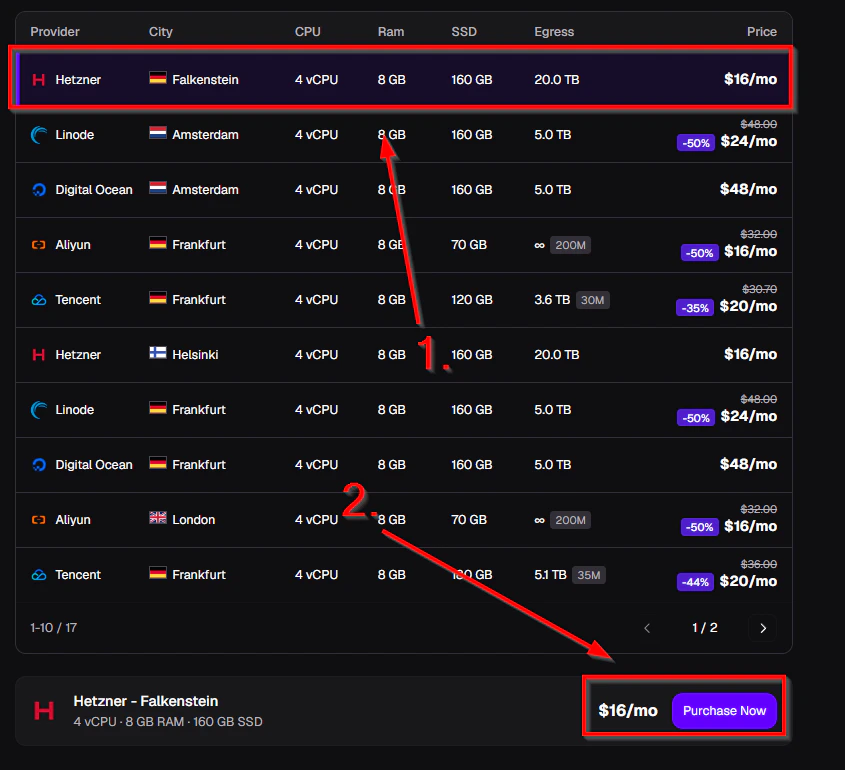 * Click **"Purchase Now"**.
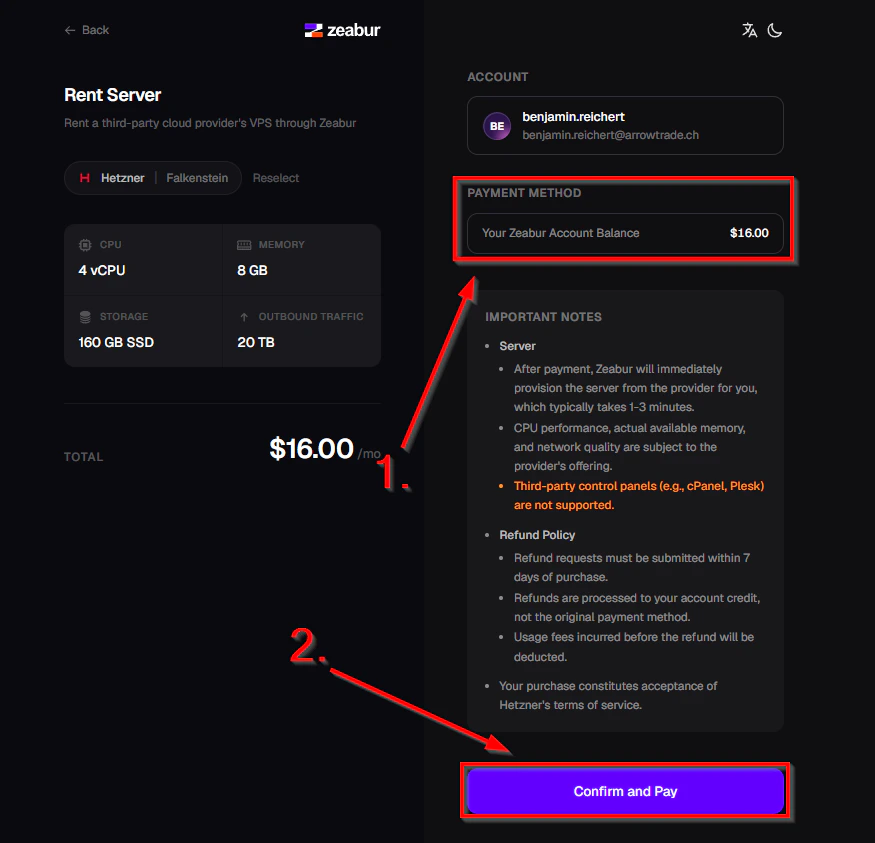 * Add a payment method if you have not already done so.
* Click **"Confirm and Pay"** to purchase the server.\
Your server will now be provisioned. This may take a moment.
***
* Add a payment method if you have not already done so.
* Click **"Confirm and Pay"** to purchase the server.\
Your server will now be provisioned. This may take a moment.
***
 ***
***
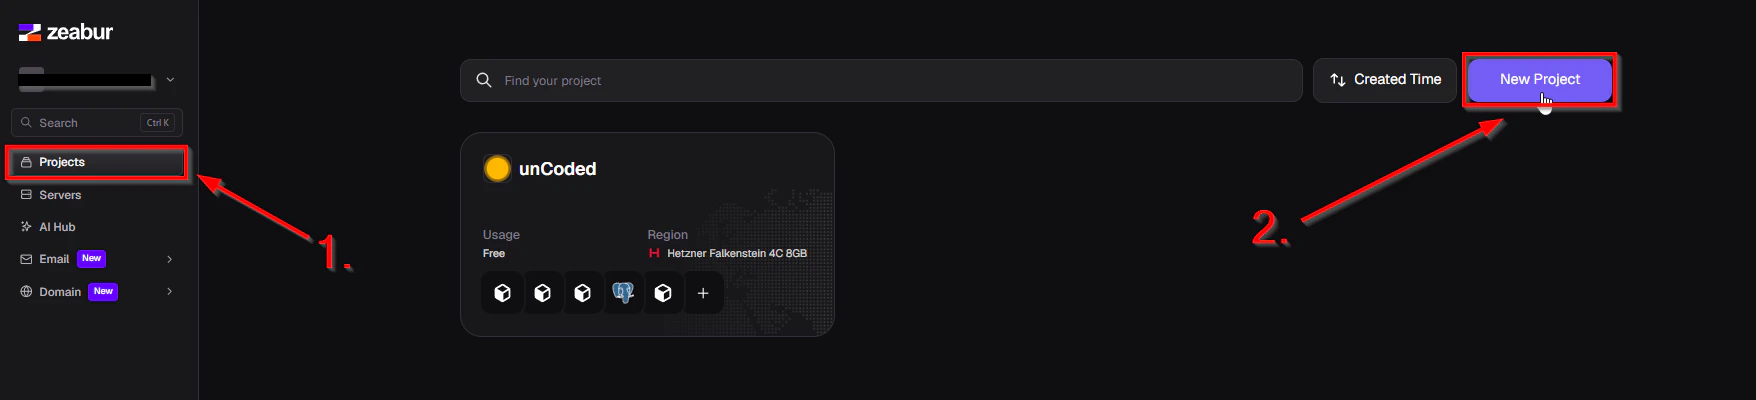 * Once your server is ready, switch to the **"Projects"** tab and click **"New Project"**.
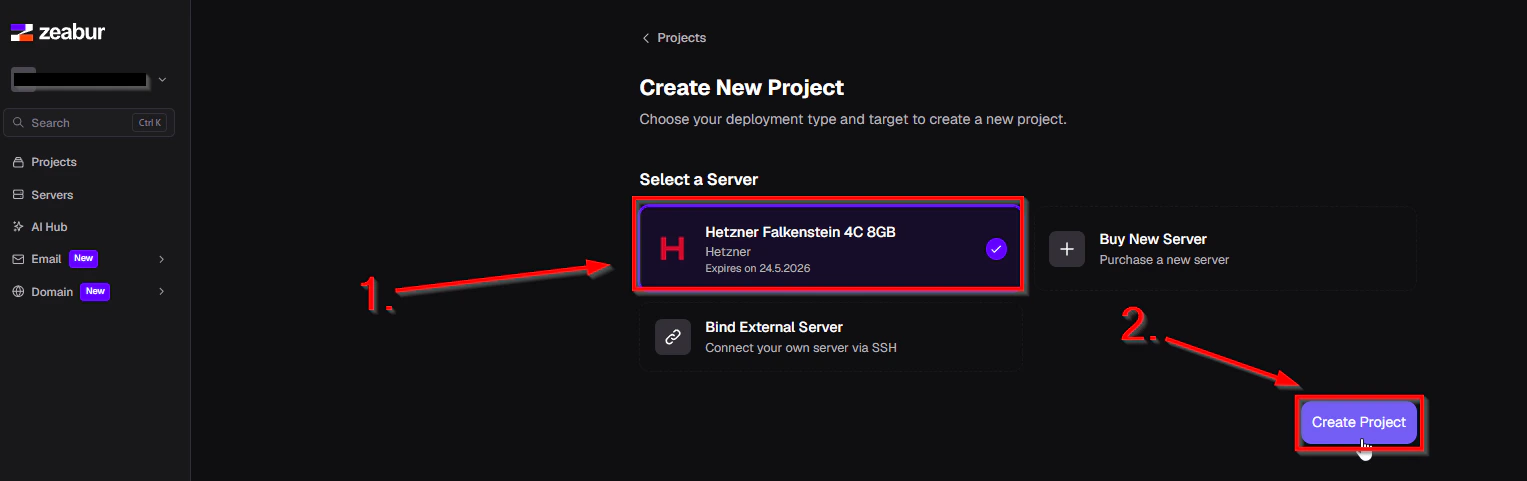 * Select your server and click **"Create Project"**.
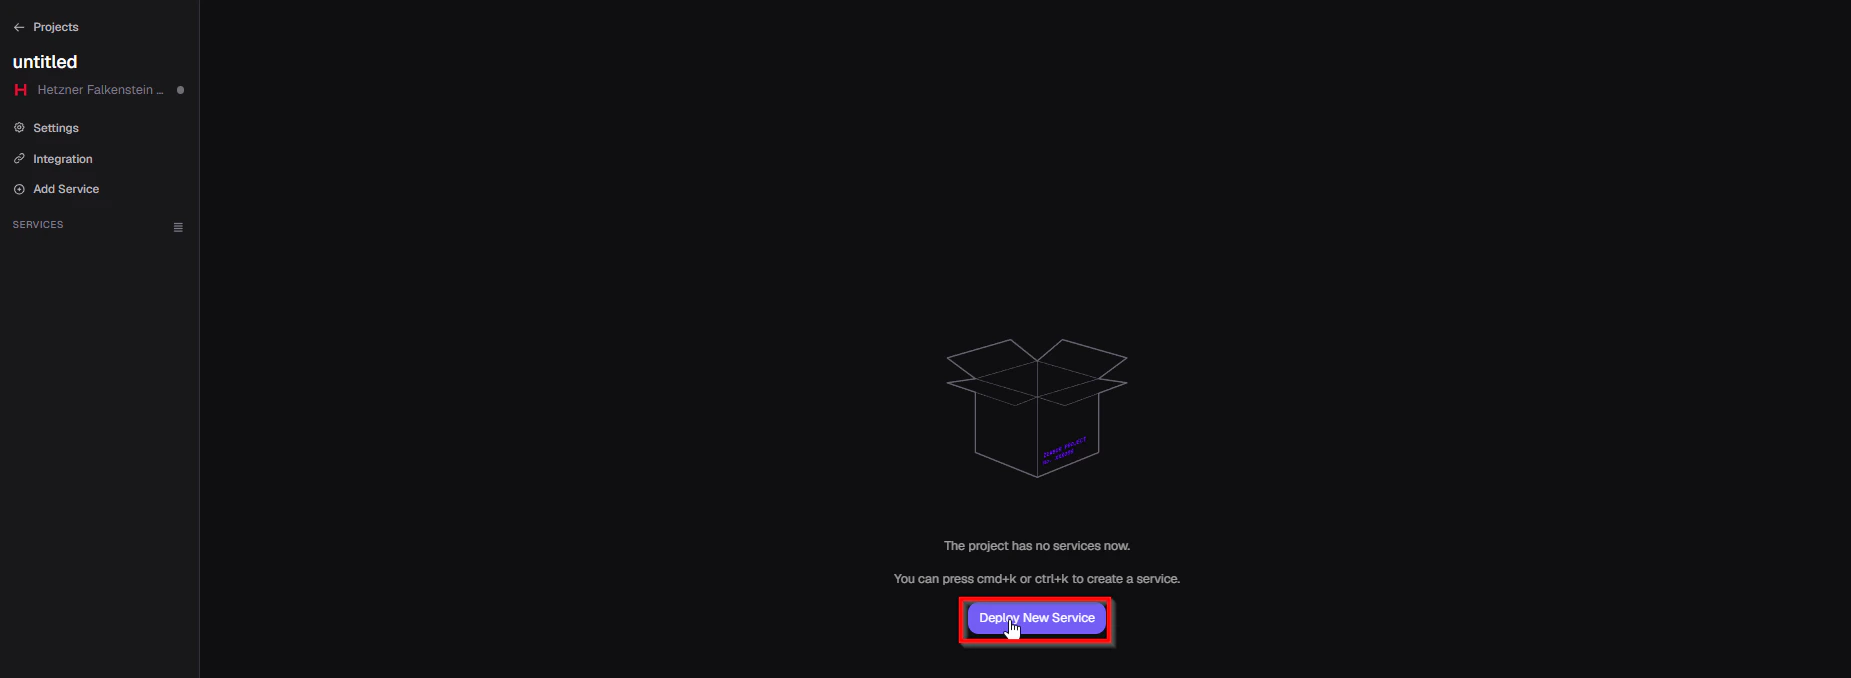 * Click **"Deploy New Service"** and search for **"unCoded"** in the search bar. Then select **unCoded**.
 * Fill in the missing fields with the required data. You’ll find most of it on Binance, such as API keys. Passwords and domains can be chosen freely.
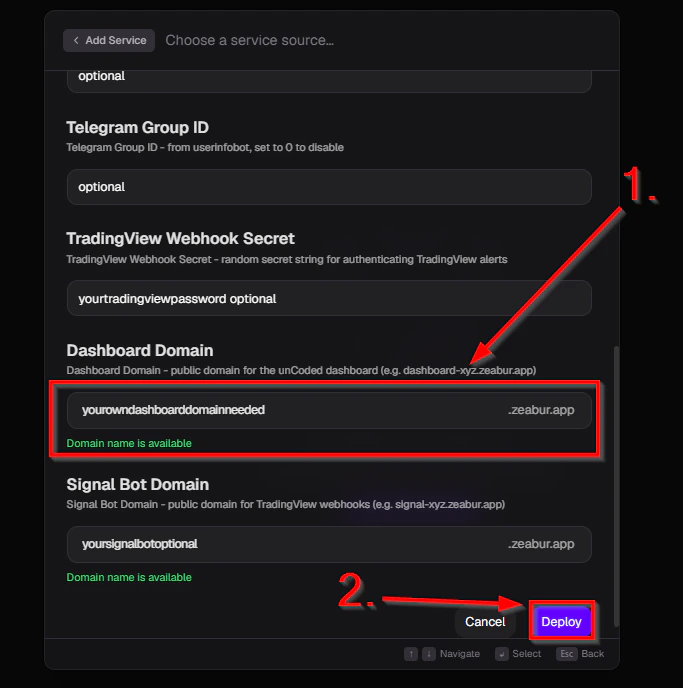 * Click **"Deploy"**.