
RequirementsBefore you begin, make sure that:
- You have an active Server.
- See recomandations in System Requirements.
- You already have your Binance API keys and Telegram bot credentials (Optional)
⚙️ Prepare the Zeabur Server
- First, log in to Zeabur using any method you prefer.

- Then, click “Servers” in the left-hand menu and select “Create”.
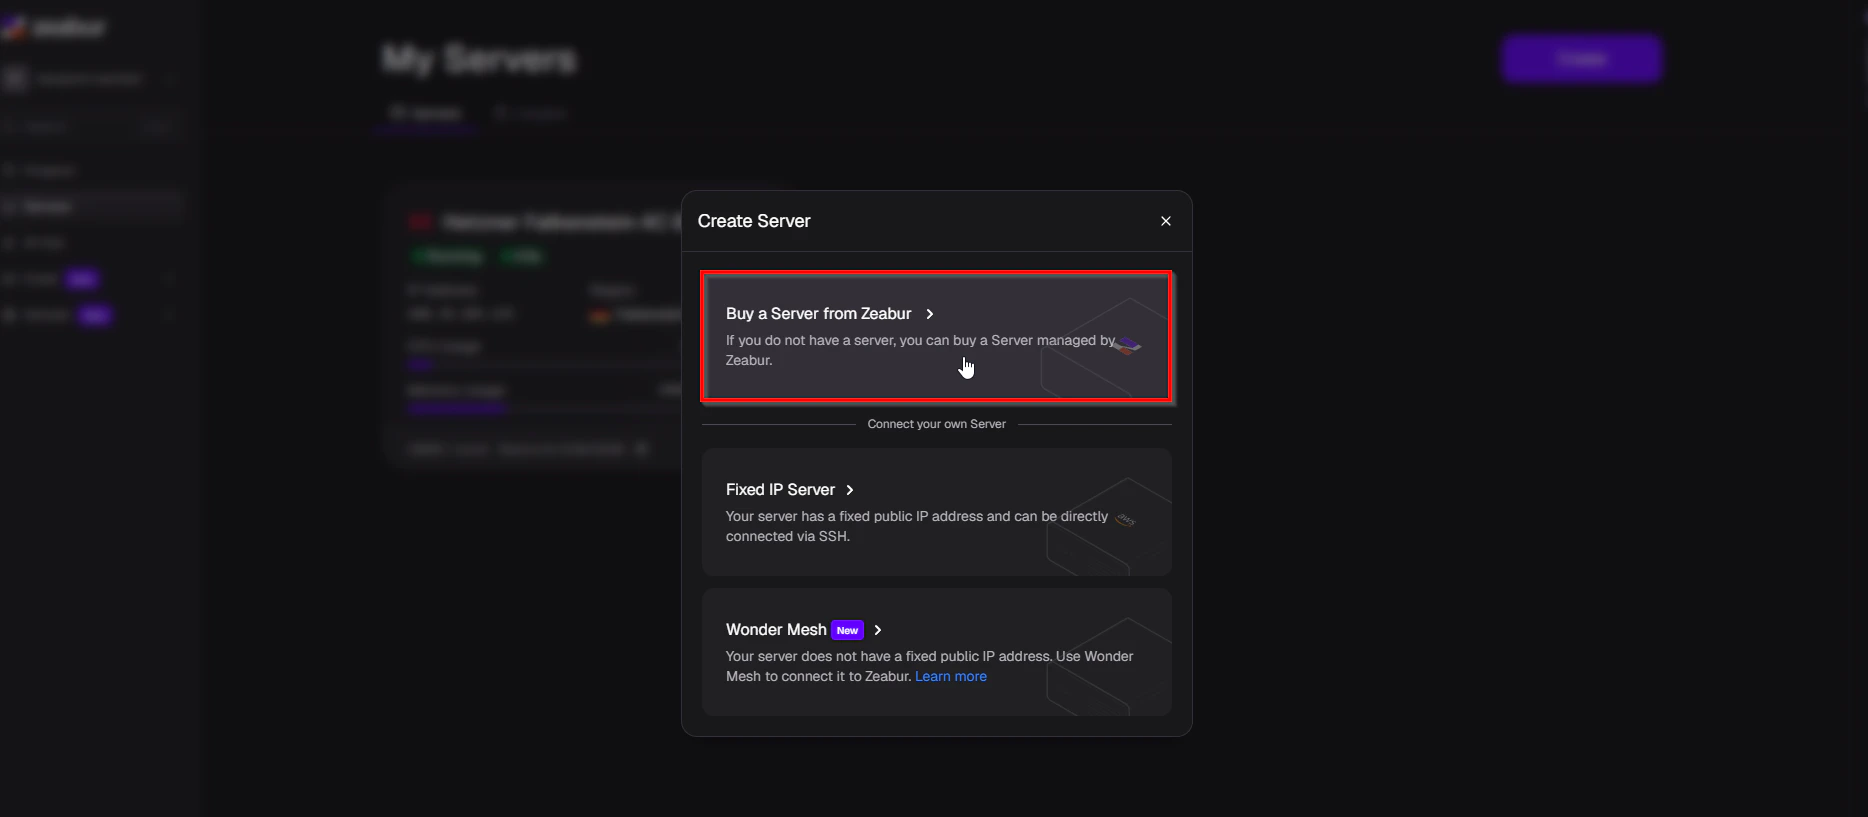
- Choose “Buy a Server from Zeabur”.
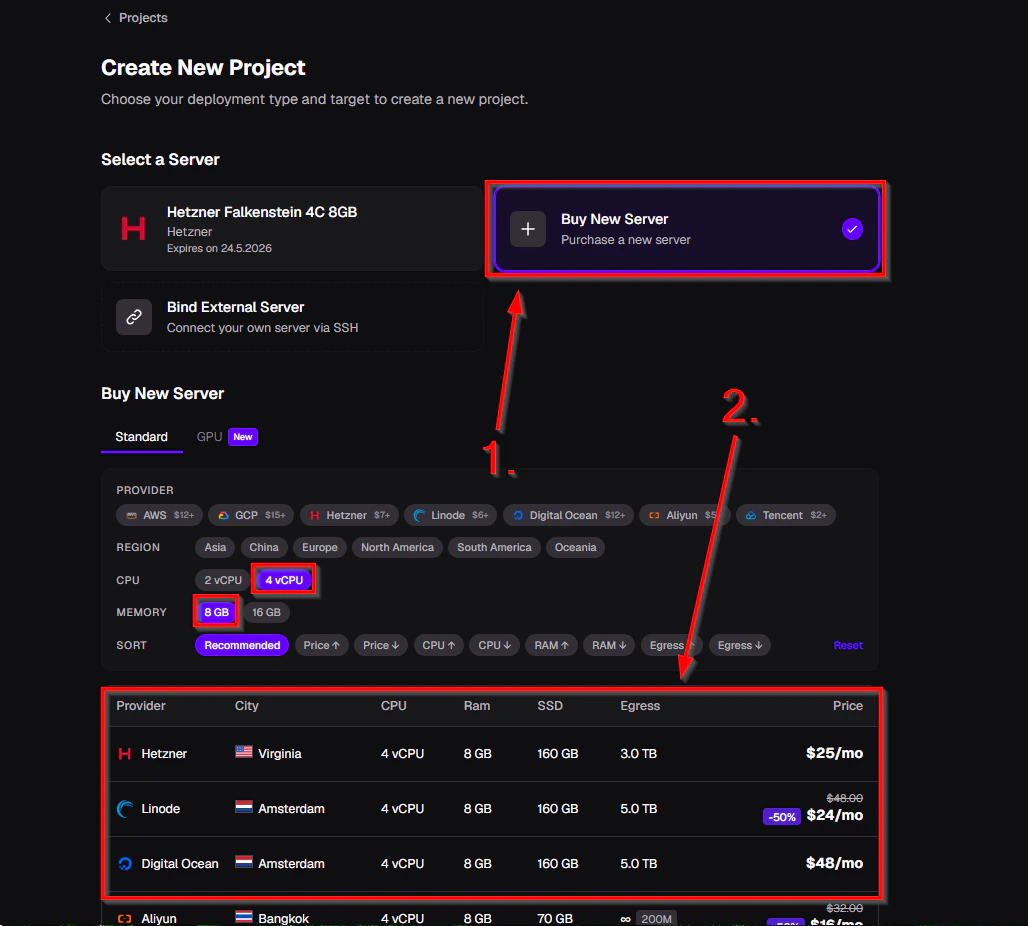
- Next, select “Buy New Server” if it is not already selected.
- Then apply the recommended filter settings.
- After that, choose a server from the list. It is recommended to select a server located in your own country and/or region if available.
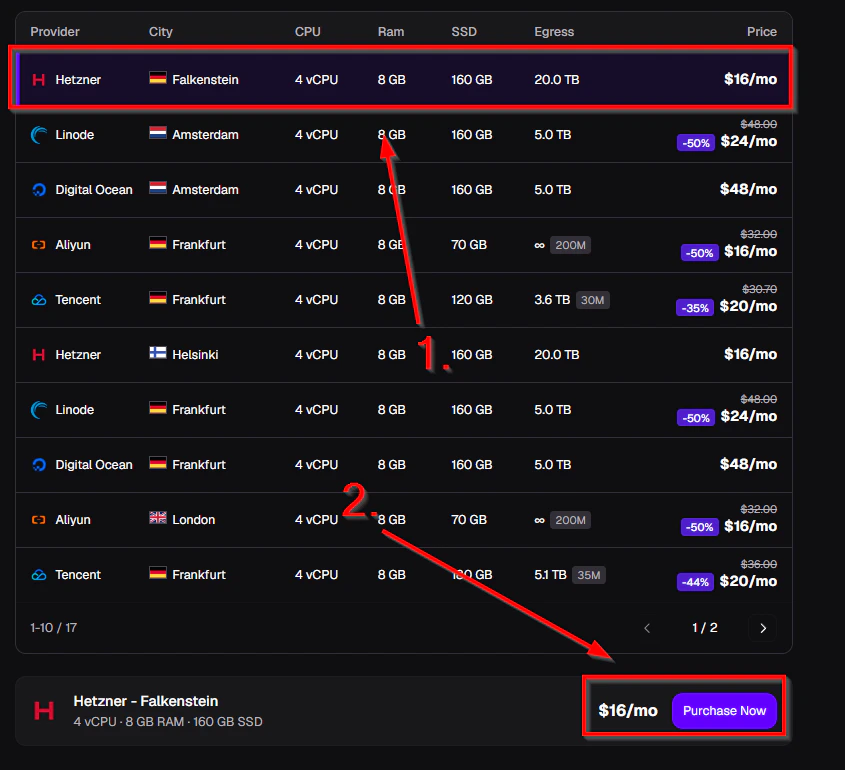
- Click “Purchase Now”.
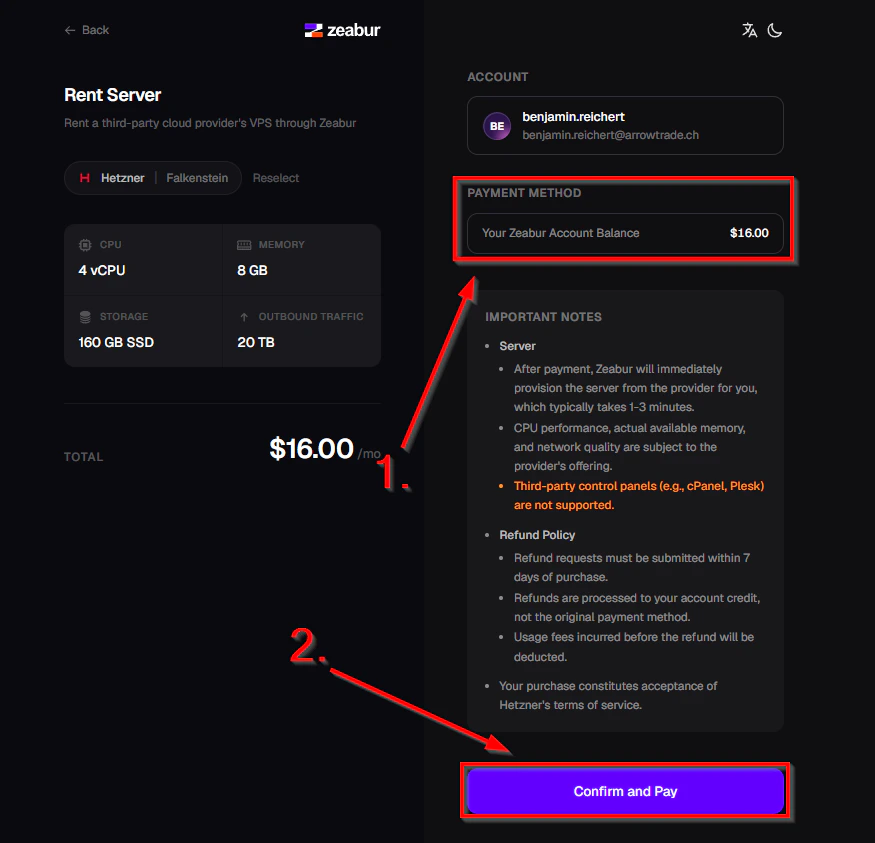
- Add a payment method if you have not already done so.
- Click “Confirm and Pay” to purchase the server.
Your server will now be provisioned. This may take a moment.
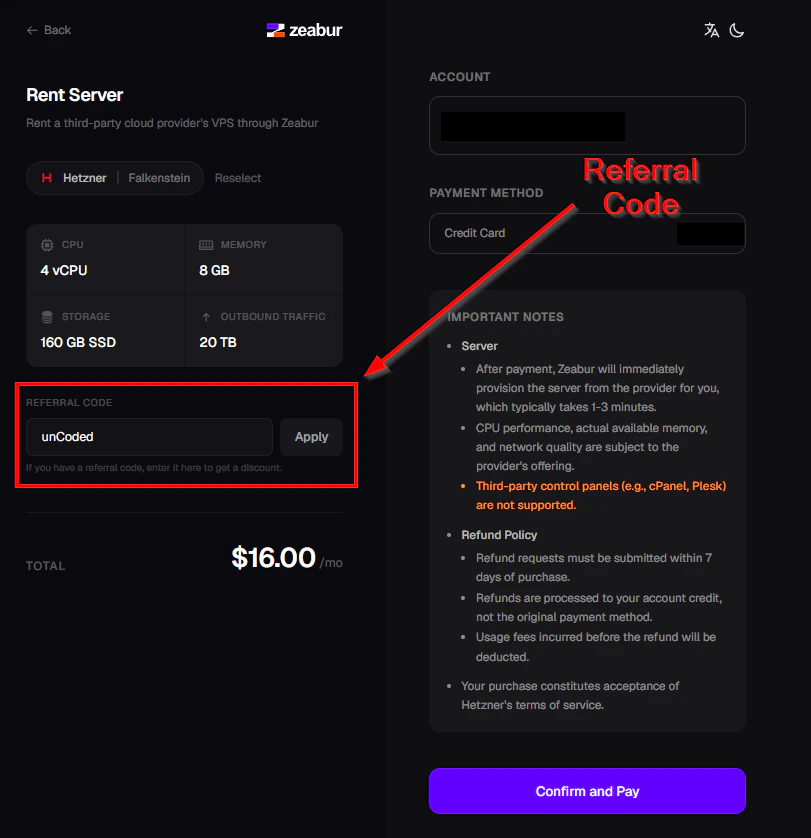
Use the code “unCoded” for 10% off your first server purchase.
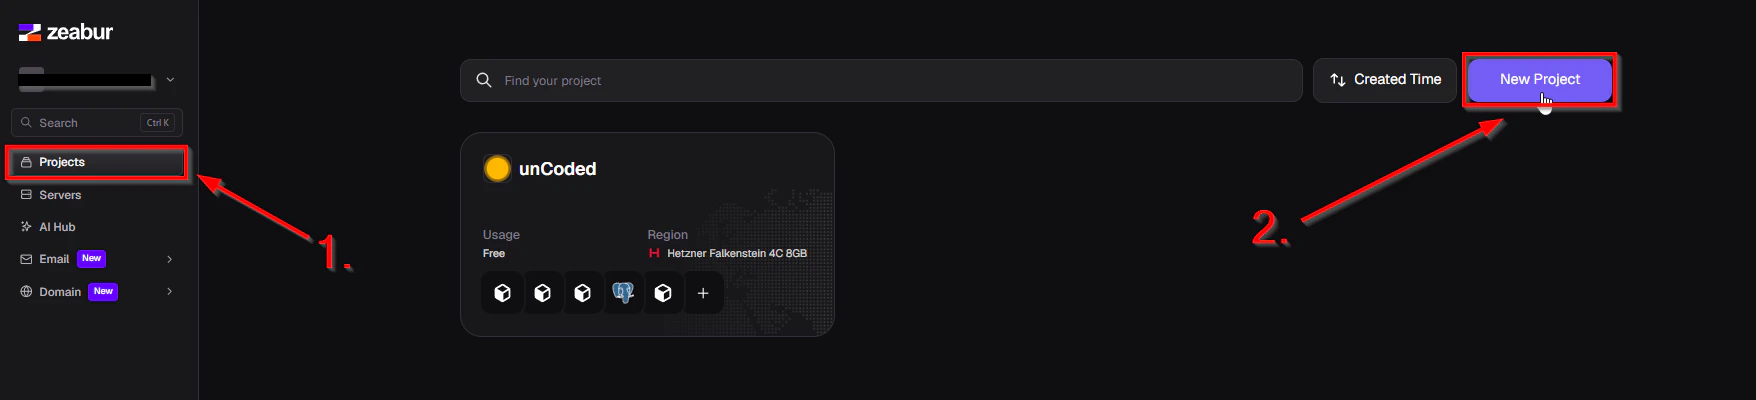
- Once your server is ready, switch to the “Projects” tab and click “New Project”.

- Select your server and click “Create Project”.
-
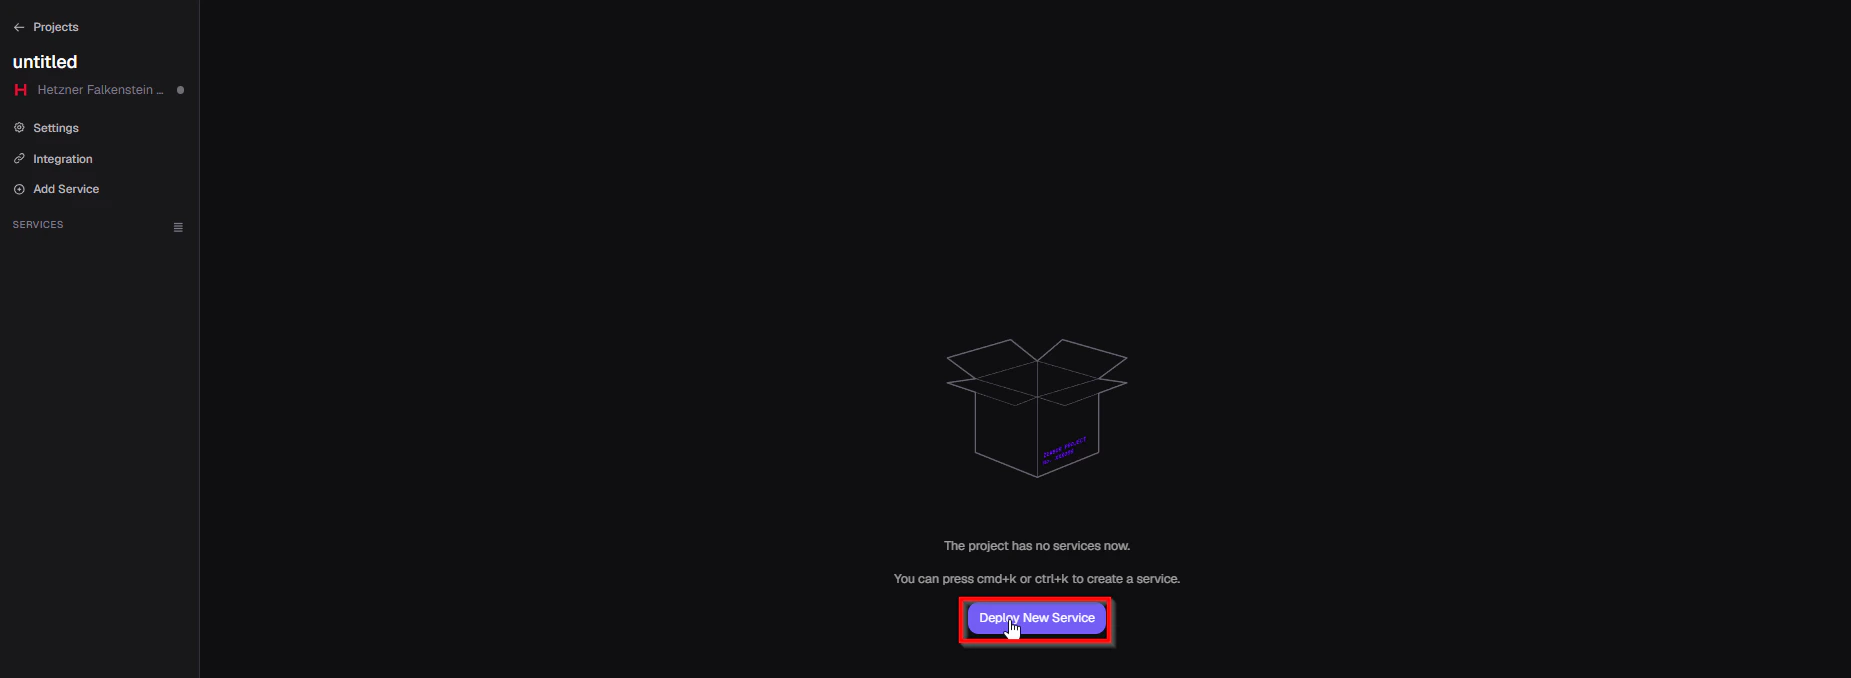
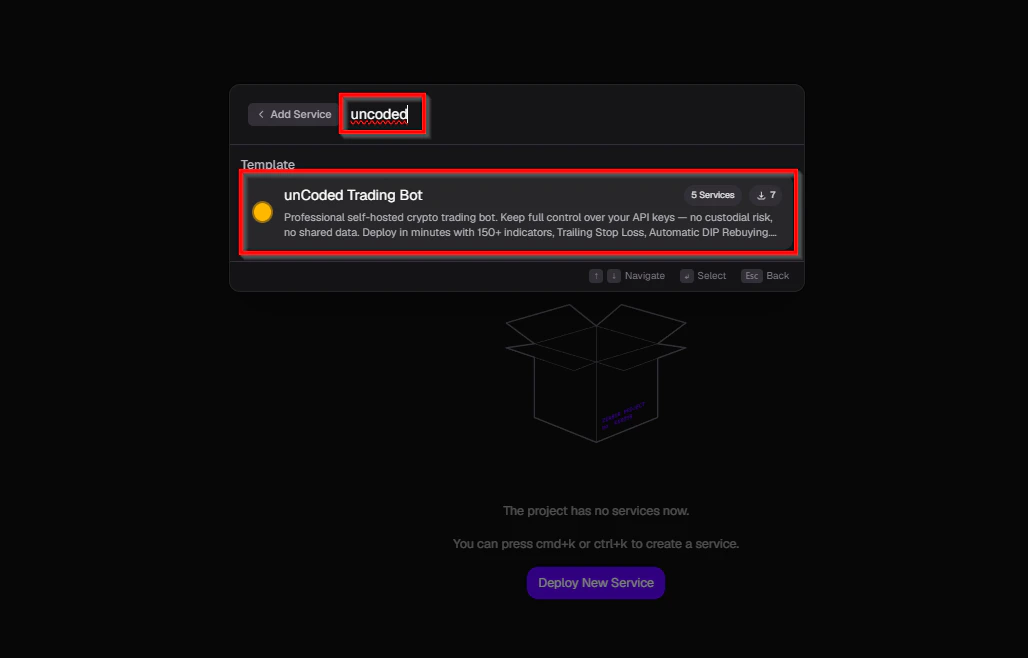
Click “Deploy New Service” and search for “unCoded” in the search bar. Then select unCoded.
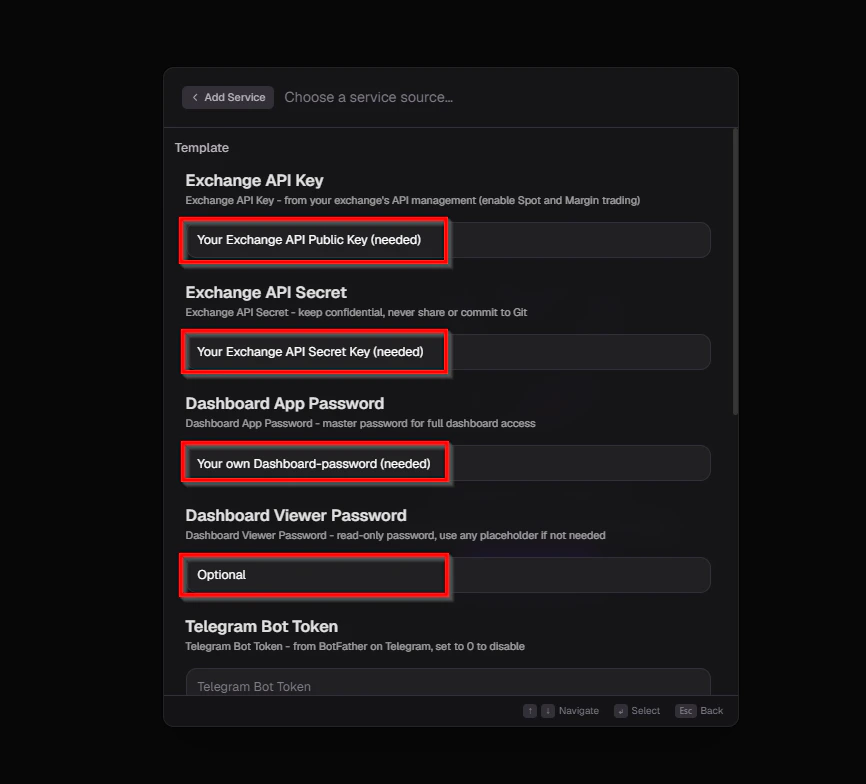
- Fill in the missing fields with the required data. You’ll find most of it on Binance, such as API keys. Passwords and domains can be chosen freely.
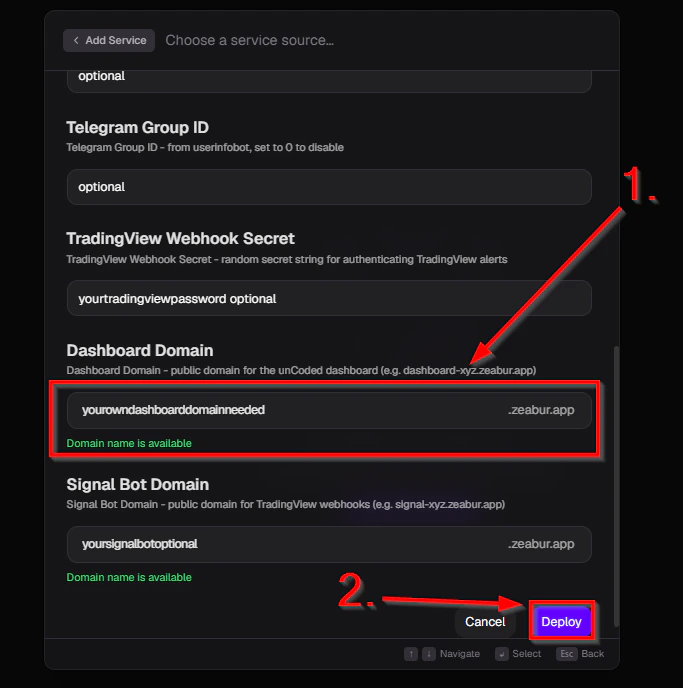
- Click “Deploy”.
Once the project has been deployed and the domain has been provisioned, you can continue setting up your bot. To start the bot setup itself, simply click on your domain. You can find out how to set up the bot here.